DIY Moss Poles: The Ultimate Guide to Supporting Your Climbing Houseplants
"Please be advised that we may receive compensation from the products featured on this page, and we participate in affiliate programs. Learn More ›"
Is your Monstera reaching for the skies (or maybe just the ceiling)? Are your Philodendrons looking a little lost without a sturdy support? If you've noticed your rainforest darlings exhibiting their natural climbing instincts, it might be time to introduce them to their very own moss pole. While you can certainly find pre-made options online, there's a special satisfaction in creating something yourself. Plus, DIYing allows you to customize the size and style to perfectly suit your plant's needs and your aesthetic preferences. Let's dive into the wonderful world of homemade moss poles and discover how you can easily create one for your leafy companions.
====================================================================
Understanding the Benefits of Moss Poles for Indoor Plants
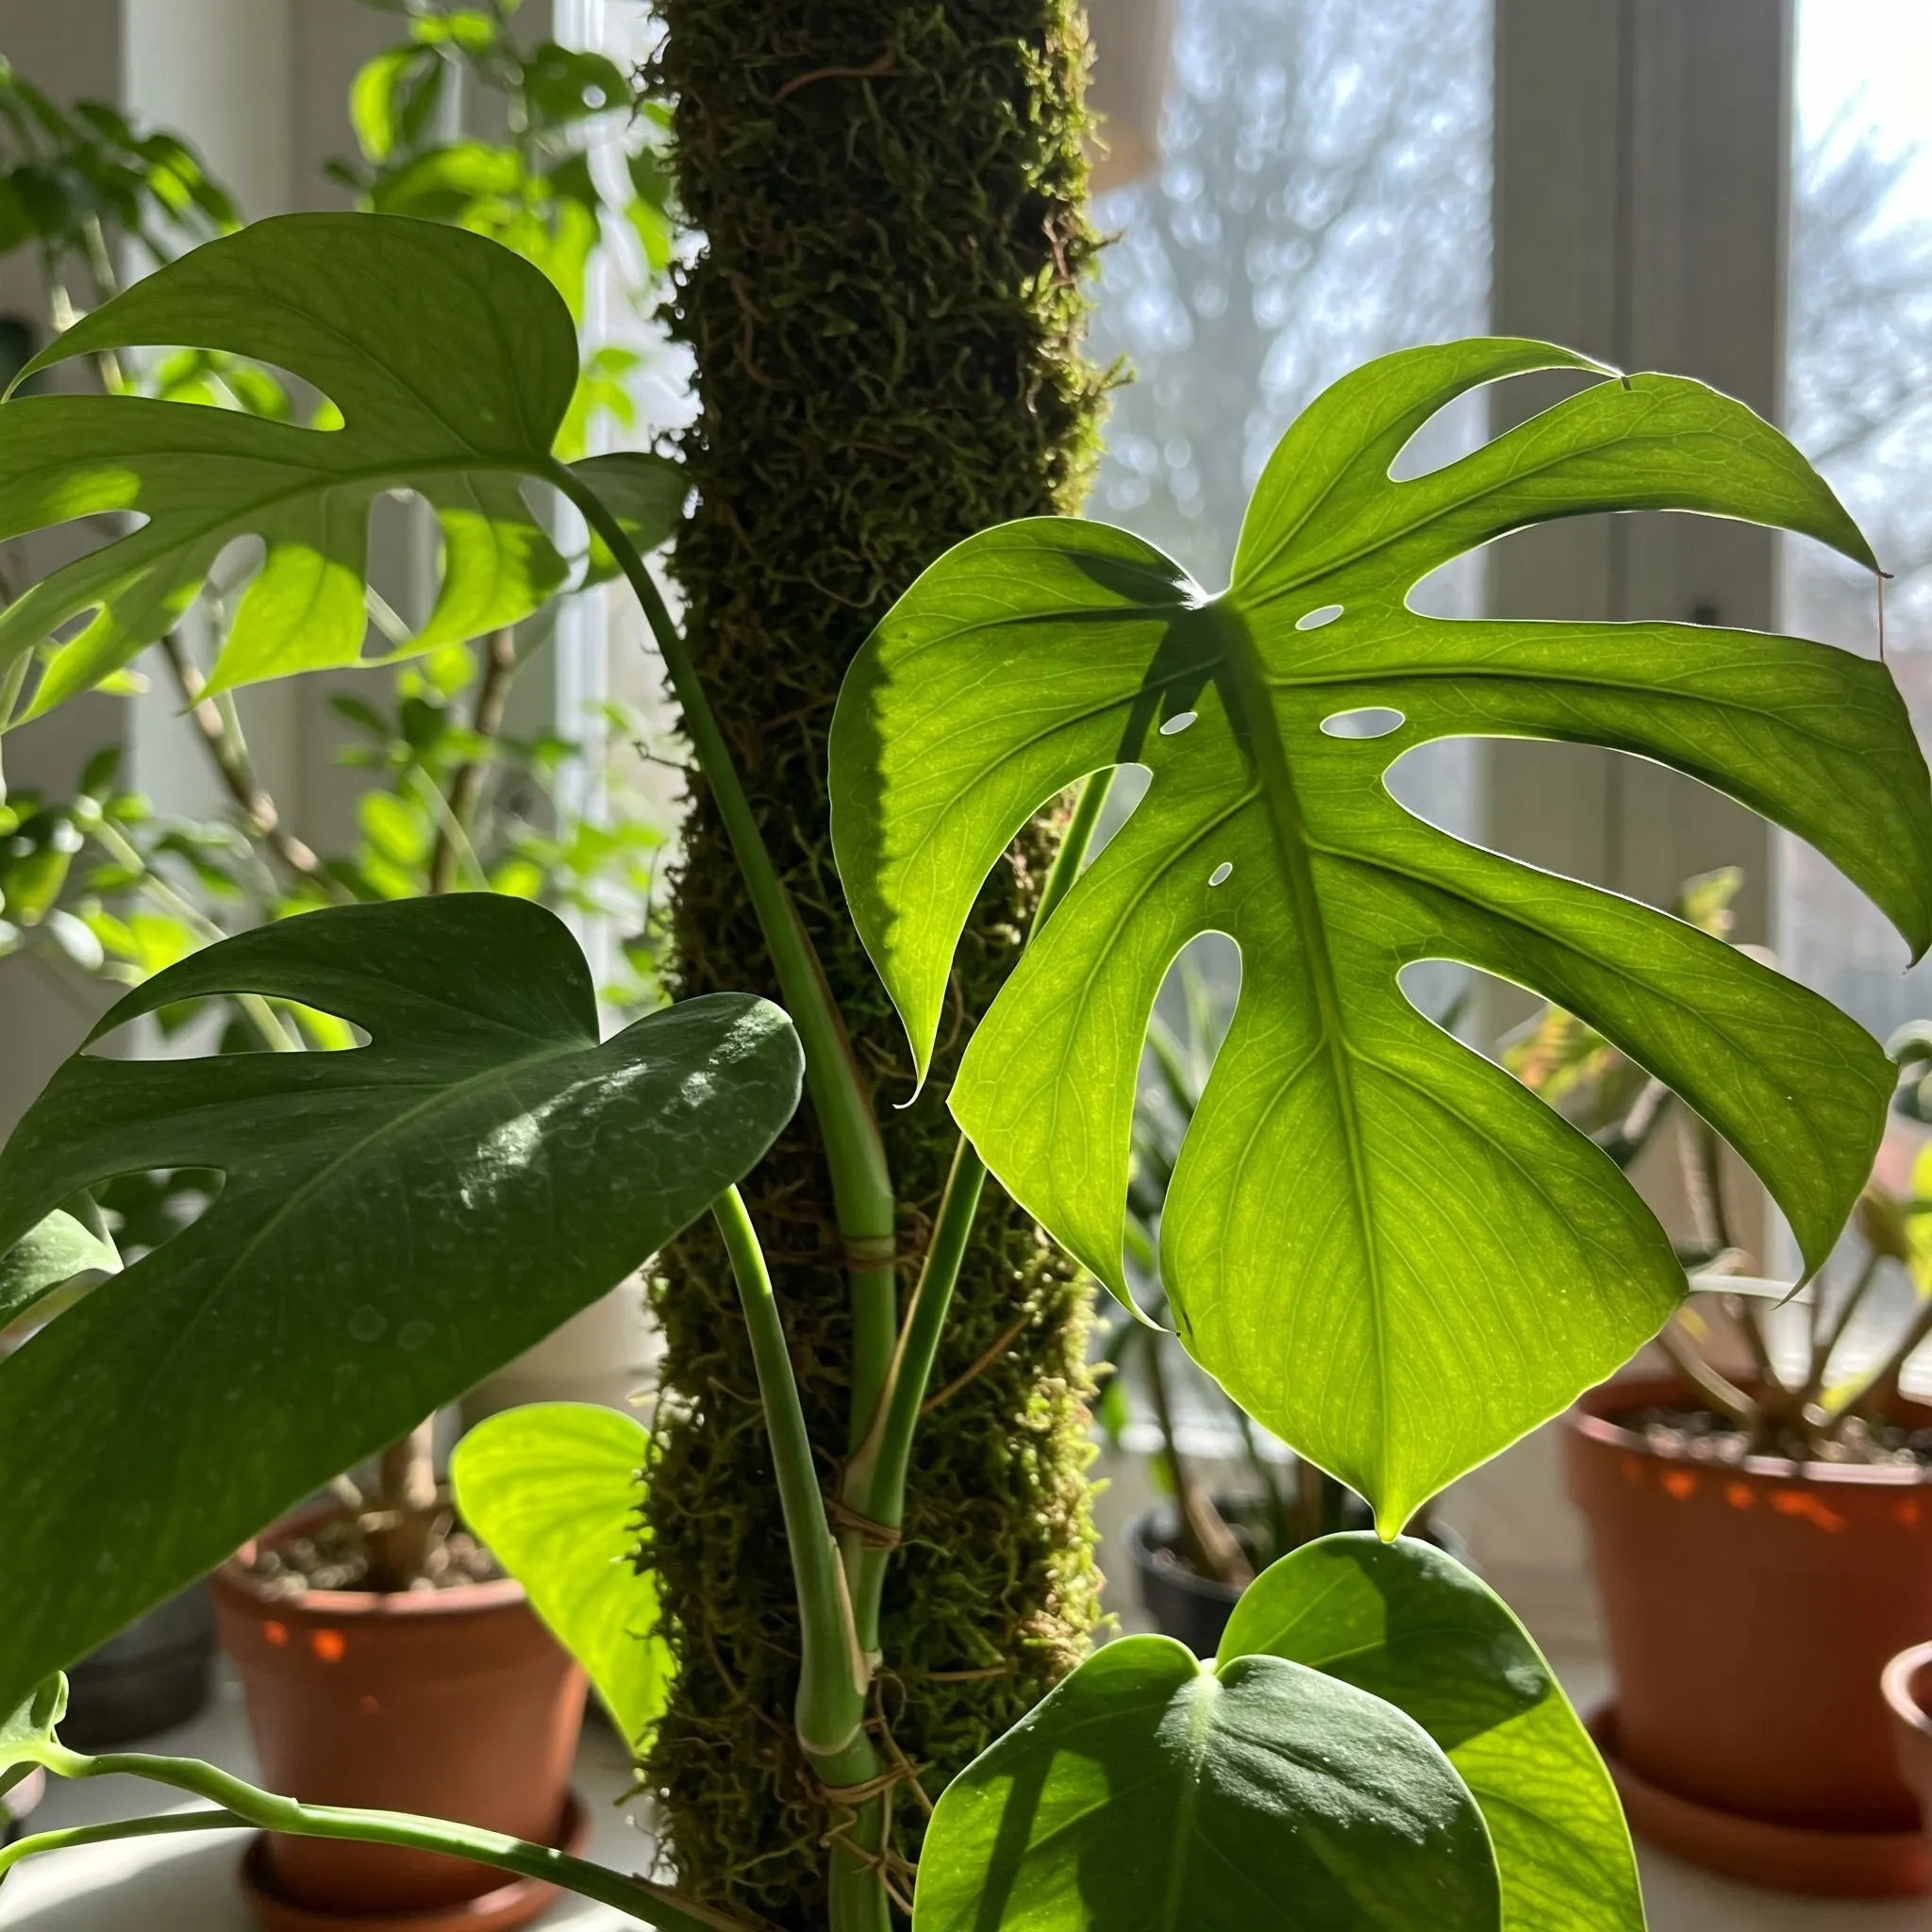
Before we get our hands dirty, let's quickly touch upon why moss poles are such fantastic additions to the lives of climbing houseplants. In their natural rainforest habitats, plants like Monsteras and Philodendrons use aerial roots to latch onto trees and climb towards the sunlight. Moss poles mimic this environment, providing a porous surface that encourages the development and attachment of these aerial roots. This not only offers physical support but also helps the plant grow larger and healthier leaves, just like they would in the wild. Think of it as bringing a little piece of the rainforest indoors!
====================================================================
Choosing Your Style: Moss-Covered vs. Moss-Filled Poles
When it comes to DIY moss poles, there are two main approaches: creating a pole that is covered in moss or one that is filled with moss. Sometimes, a moss-covered version might even be referred to as a "moss stick." The construction methods for each differ slightly, so it's good to decide which style you prefer right from the start. A moss-covered pole typically involves wrapping moss around a core structure, often a PVC pipe. On the other hand, a moss-filled pole is created by packing damp moss inside a mesh cylinder. Both options are effective, and the choice often comes down to personal preference and the materials you have readily available.
====================================================================
Gathering Your Supplies: Essential Tools and Materials
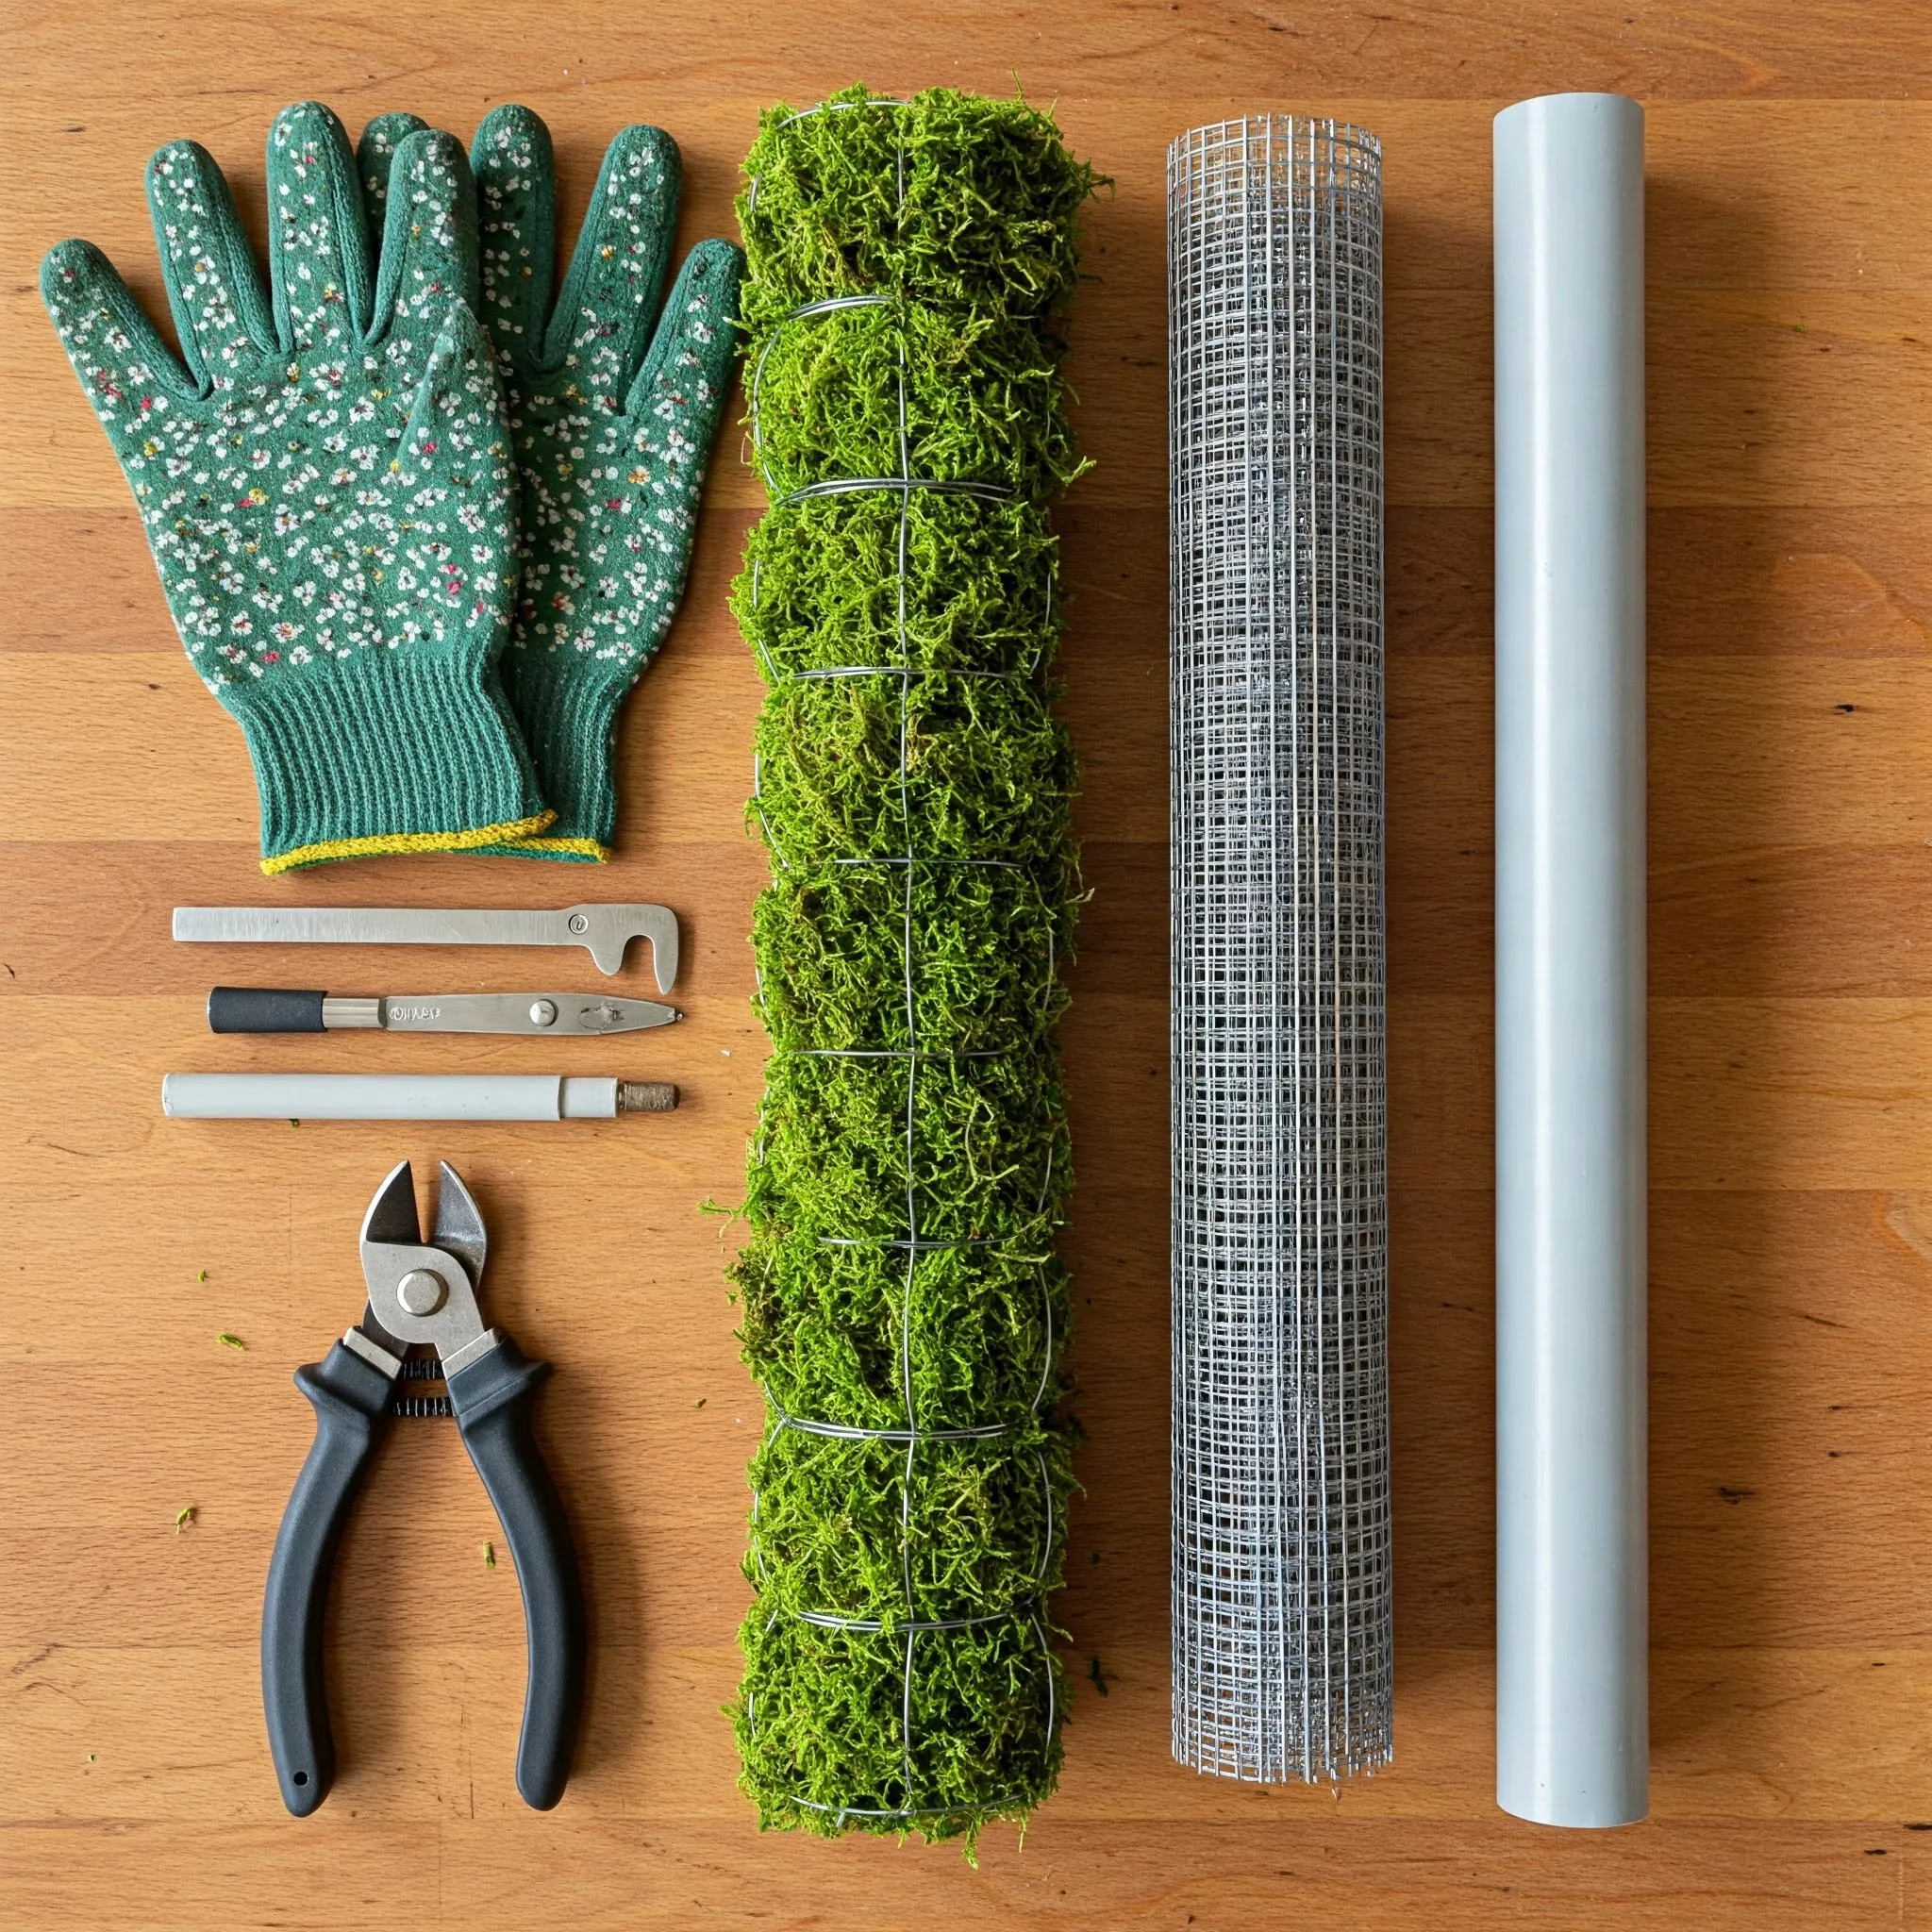
To embark on your moss pole adventure, you'll need to gather a few essential tools and materials. Here's a comprehensive list to get you started:
- Wire Cutters: For trimming mesh or wire.
- Cut-Resistant Gloves: To protect your hands when working with wire mesh.
- Hacksaw: If you opt for a moss-covered pole using a PVC pipe.
- Fishing Line or Copper Wire (Optional): For securing moss to a pipe or stake.
- Sphagnum Peat Moss: A must-have for filled moss poles and a great option for covered ones.
- Sheet Moss (Optional): Another option for wrapping a pipe or stake, offering a different texture.
- Hardware Cloth or Chicken Wire: For creating the cylinder of a filled moss pole. Plastic fencing can also work.
- 1-inch PVC Pipe or Sturdy Stake (Optional): For the core of a moss-covered pole.
- Plastic-Coated Wire Twist Ties or Rust-Resistant Copper Wire: For fastening the mesh cylinder.
You might find helpful for sourcing some of these materials and understanding their uses in various DIY projects.
====================================================================
Step-by-Step Guide: Crafting a Moss-Filled Pole
Let's walk through the process of creating a moss-filled pole, which is a popular and effective method.
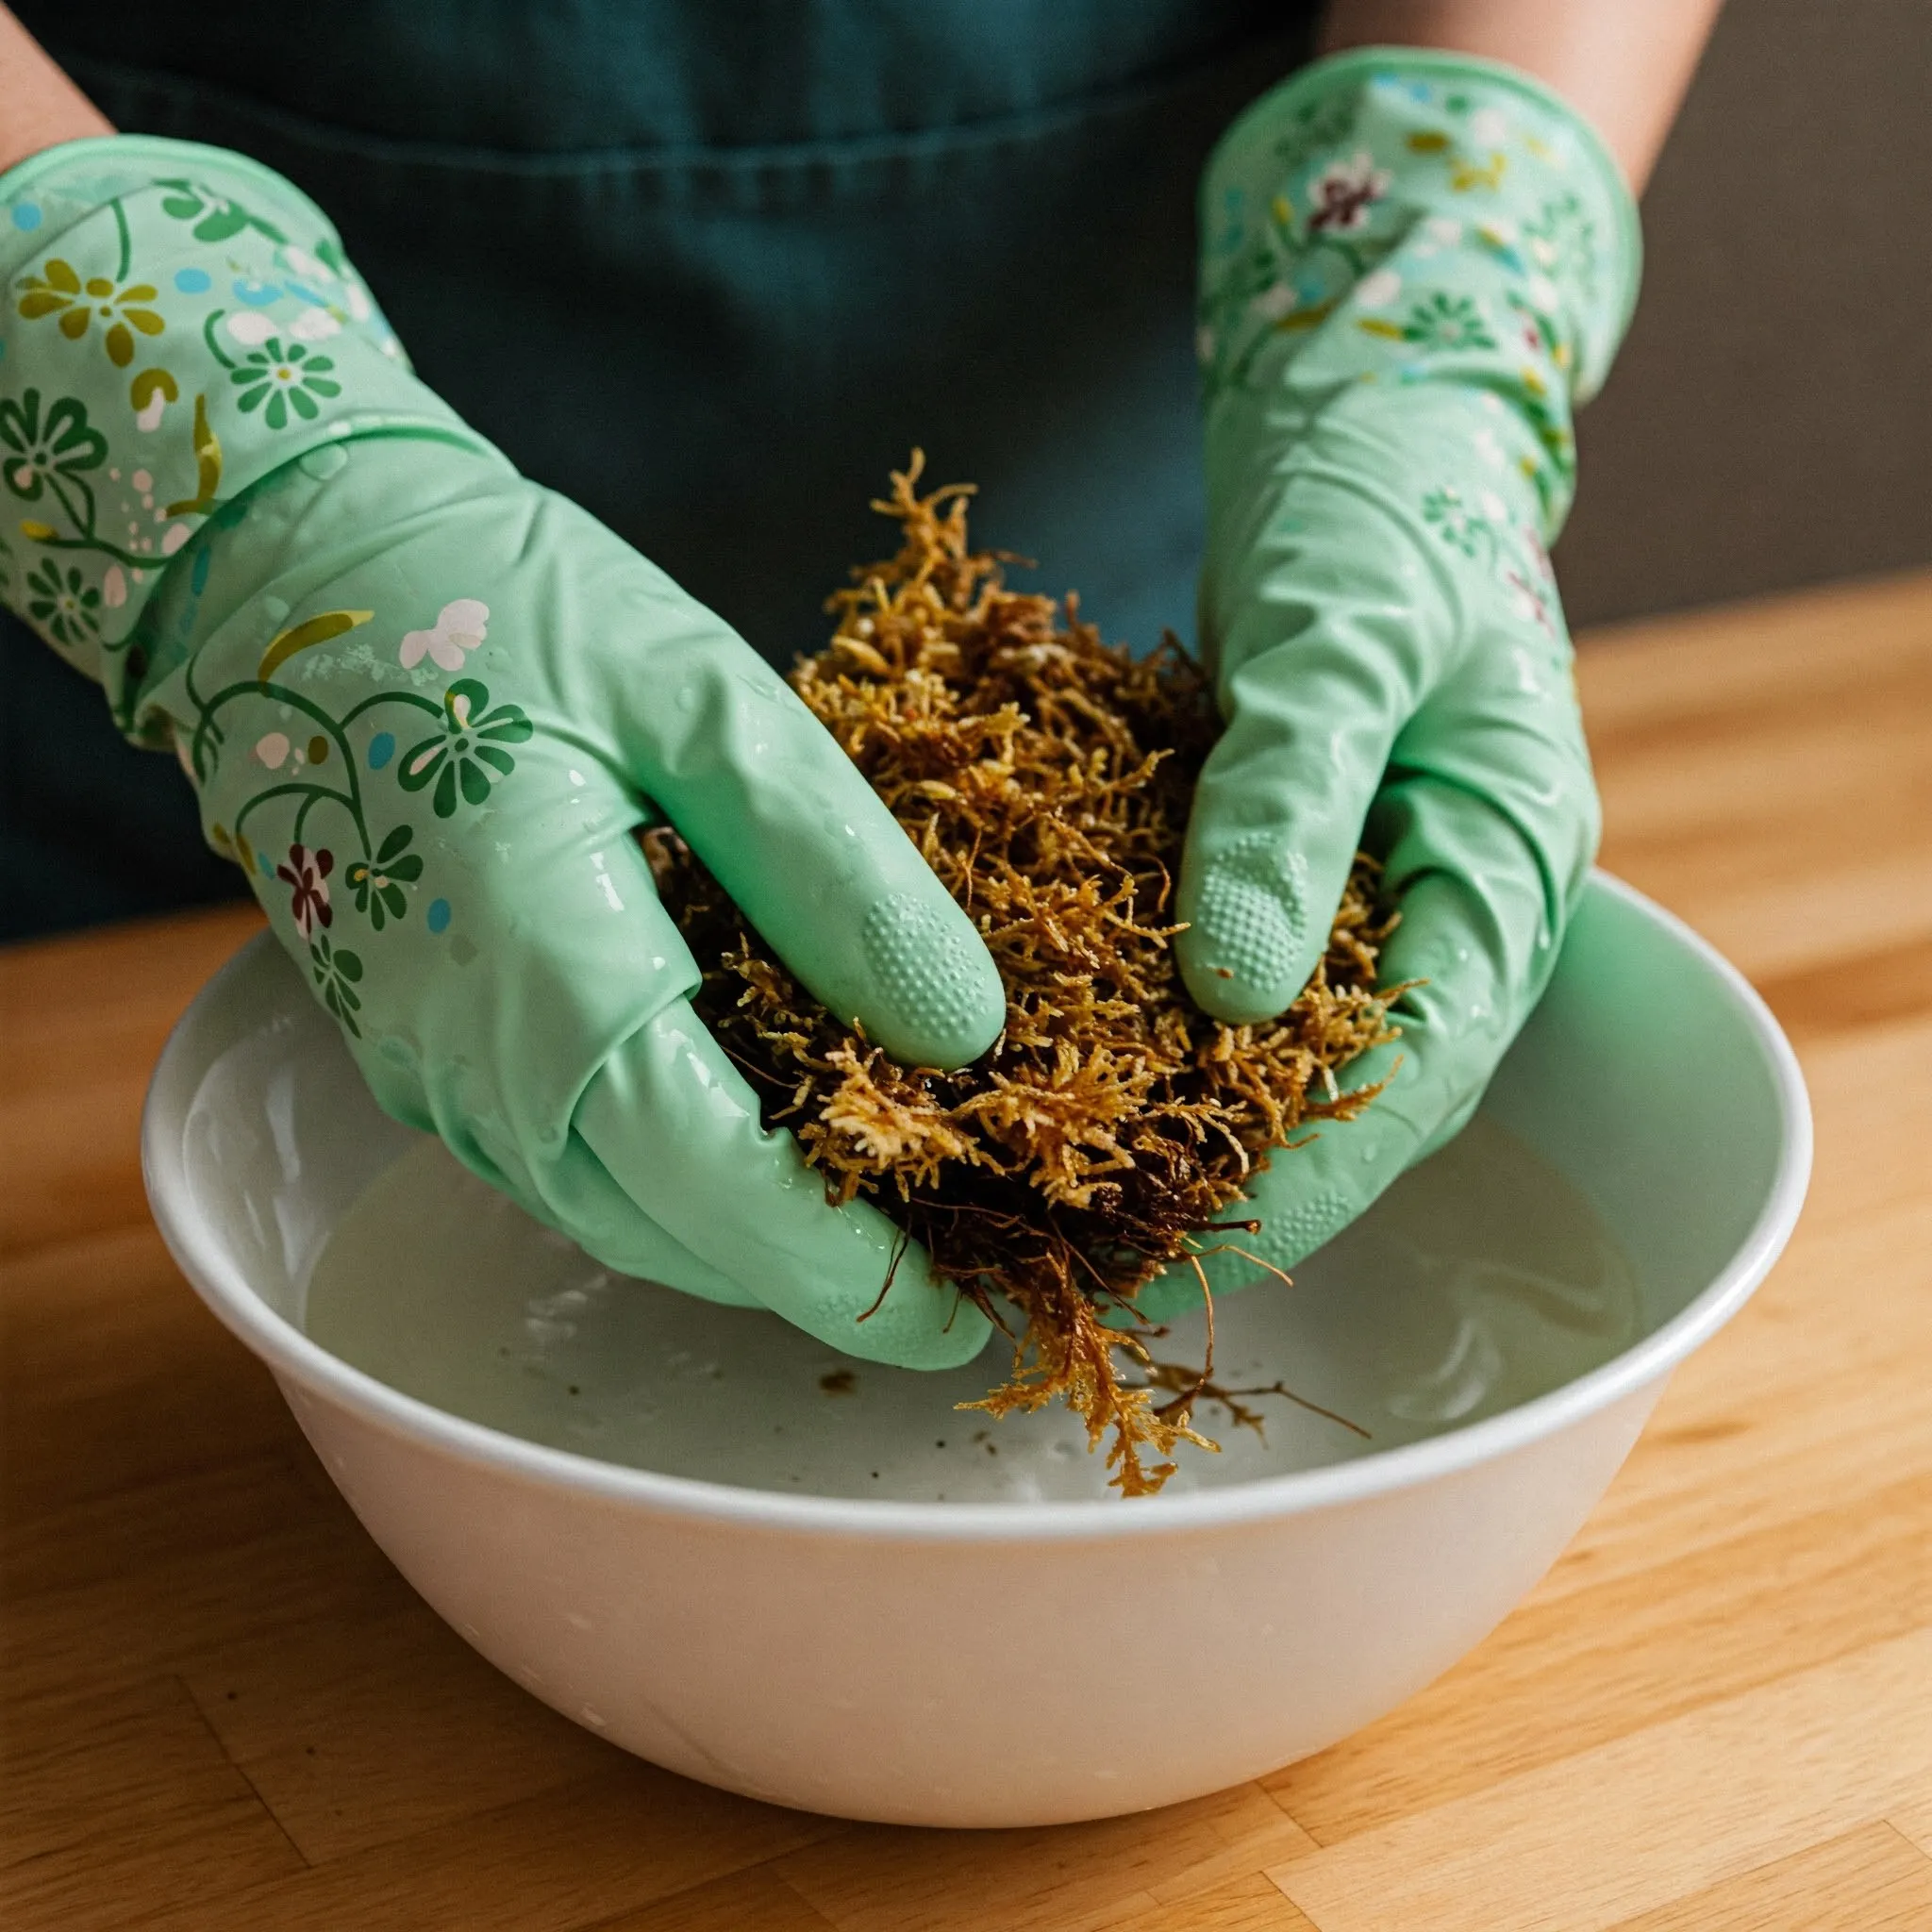
Step 1: Hydrating Your Moss: Begin by soaking your sphagnum peat moss in water for about 15 minutes. This allows the moss to fully saturate, making it easier to work with and ensuring it retains moisture for your plant's roots. Once soaked, gently squeeze out any excess water.
Step 2: Measuring for Success: Determine the ideal size for your moss pole. Consider the depth of your plant's pot, the current height of your houseplant, and how much vertical growth you anticipate. Remember that you'll want to bury the lower portion of the pole (about one-third) in the soil for stability, so don't include that section in your moss measurements. Also, think about the desired width of the pole to comfortably accommodate your plant's aerial roots.
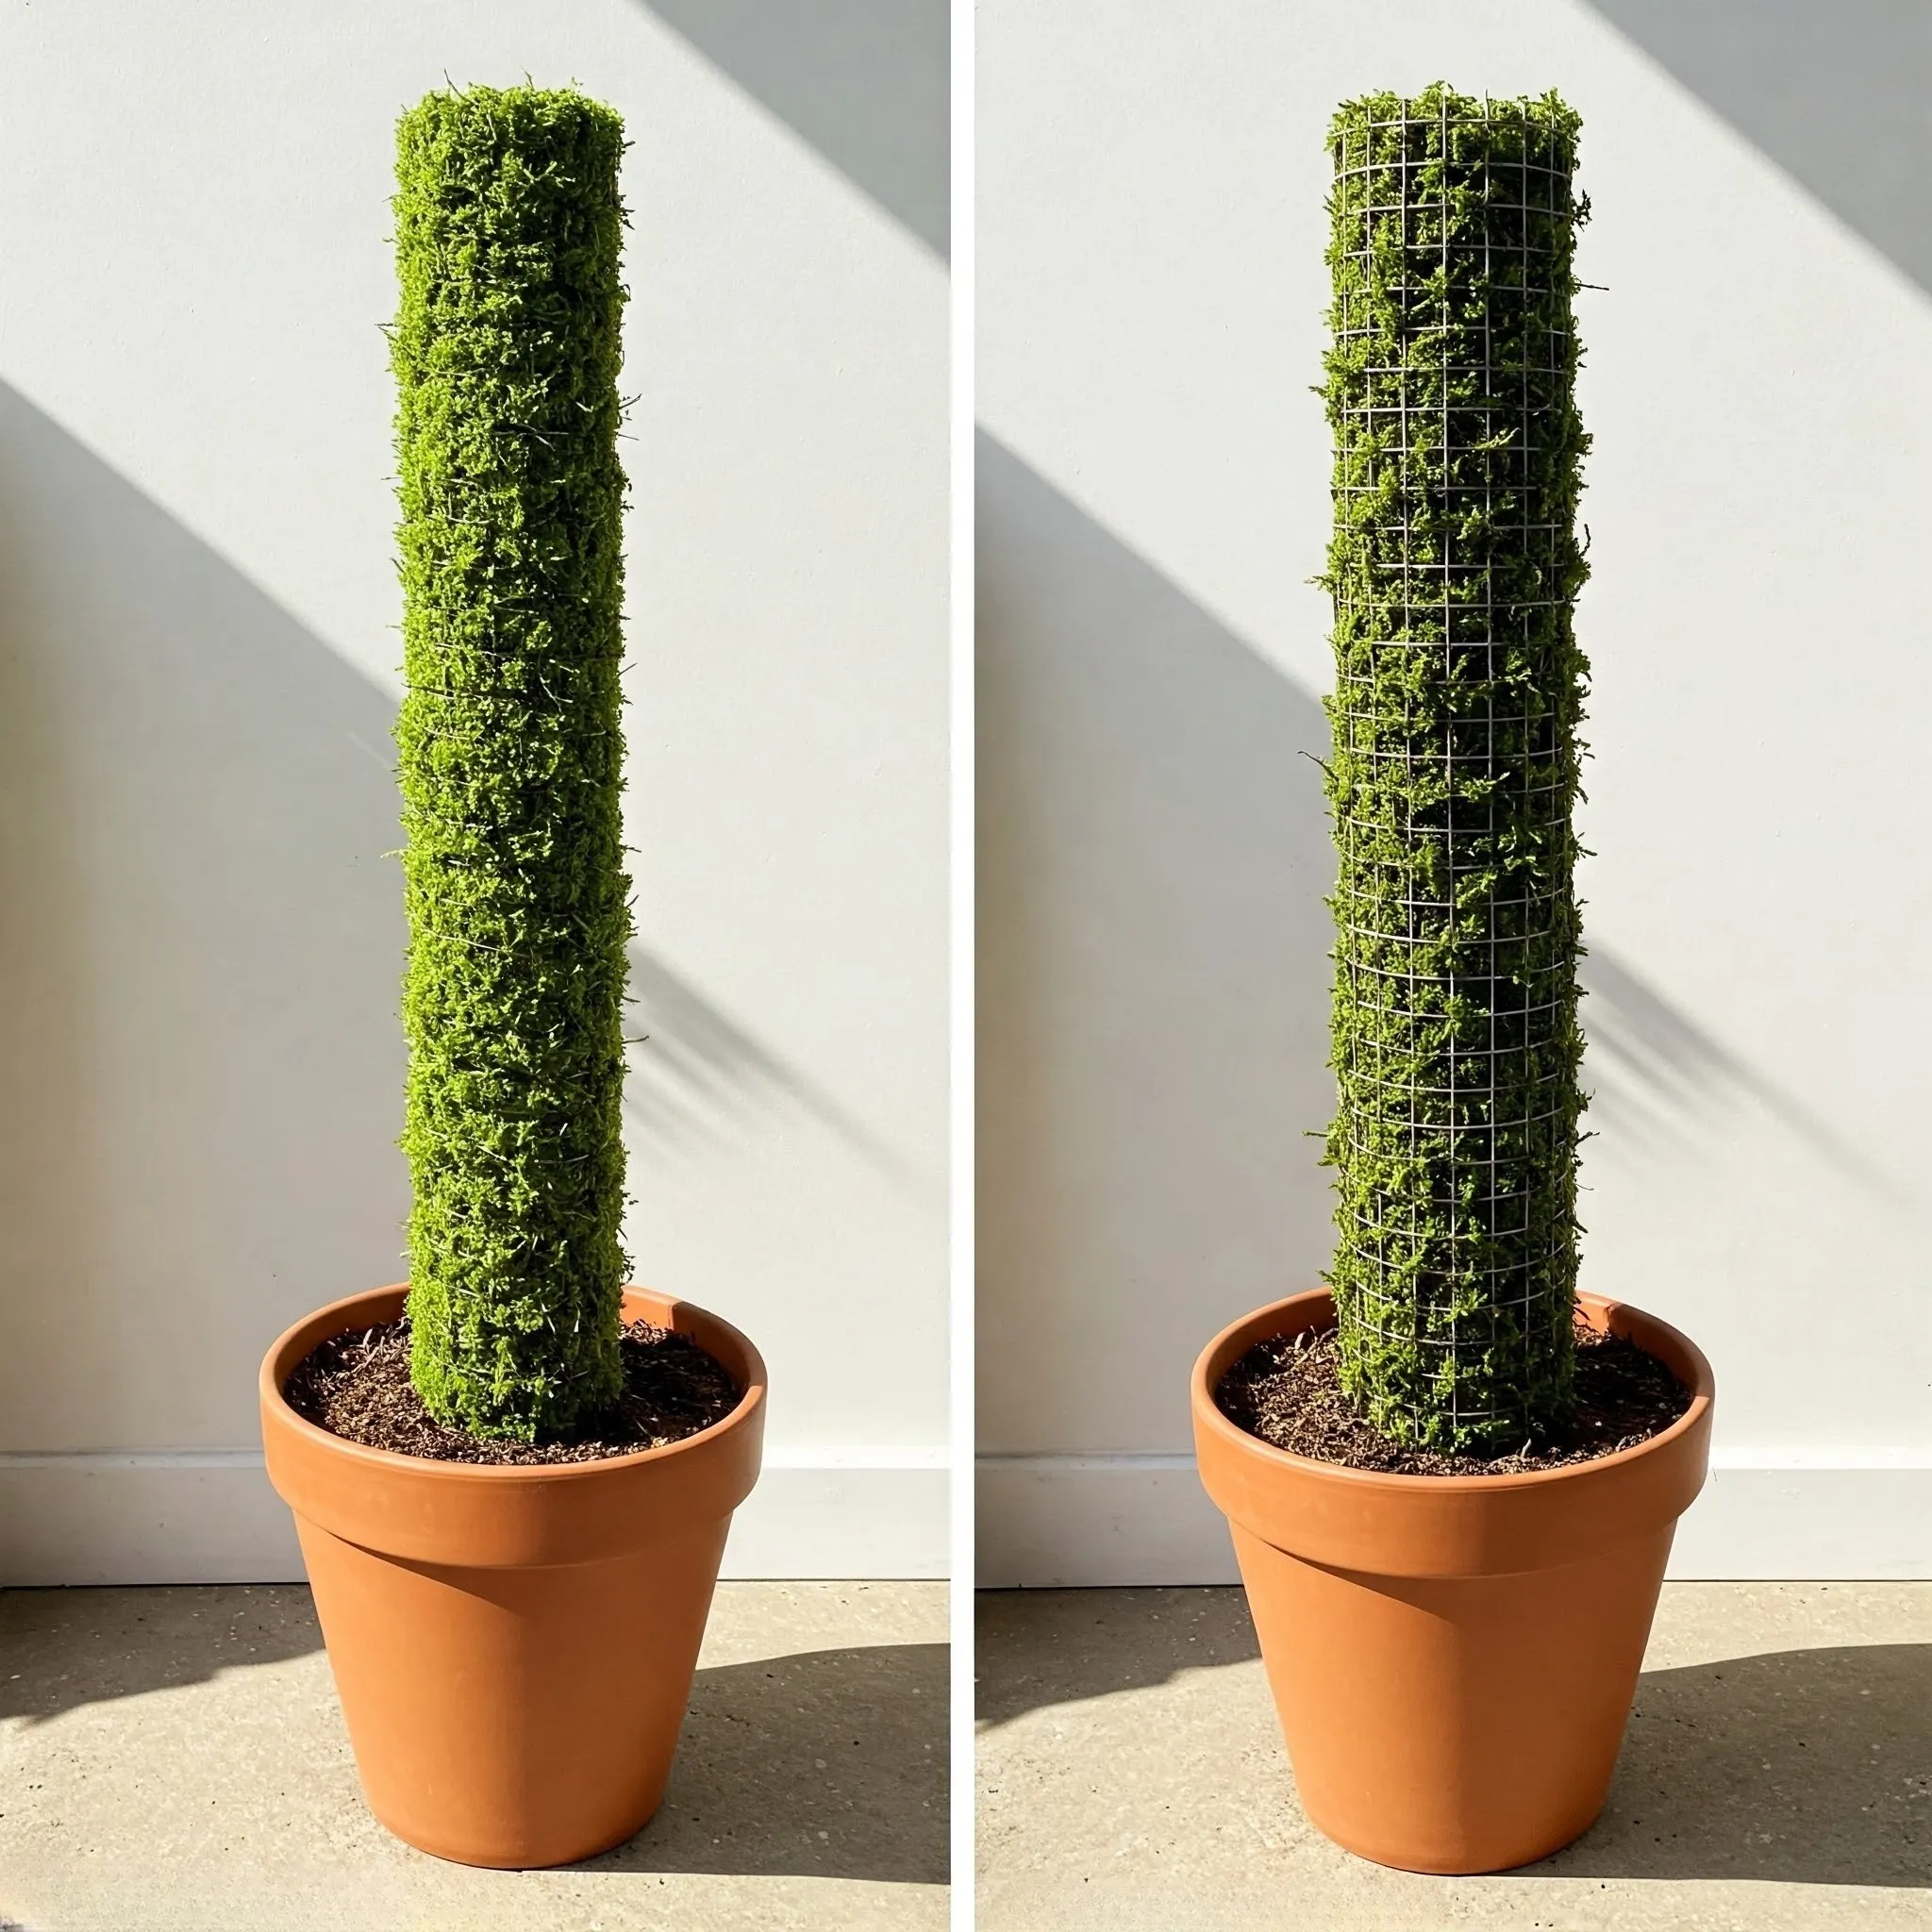
Step 3: Cutting Your Mesh: Using wire cutters and wearing your protective gloves, cut a piece of hardware cloth or chicken wire to your desired dimensions. A common size is 12 inches wide and either 24 or 36 inches tall, which will create a cylinder roughly 3 ½ inches in diameter. If you're using plastic fencing, heavy-duty scissors should do the trick.
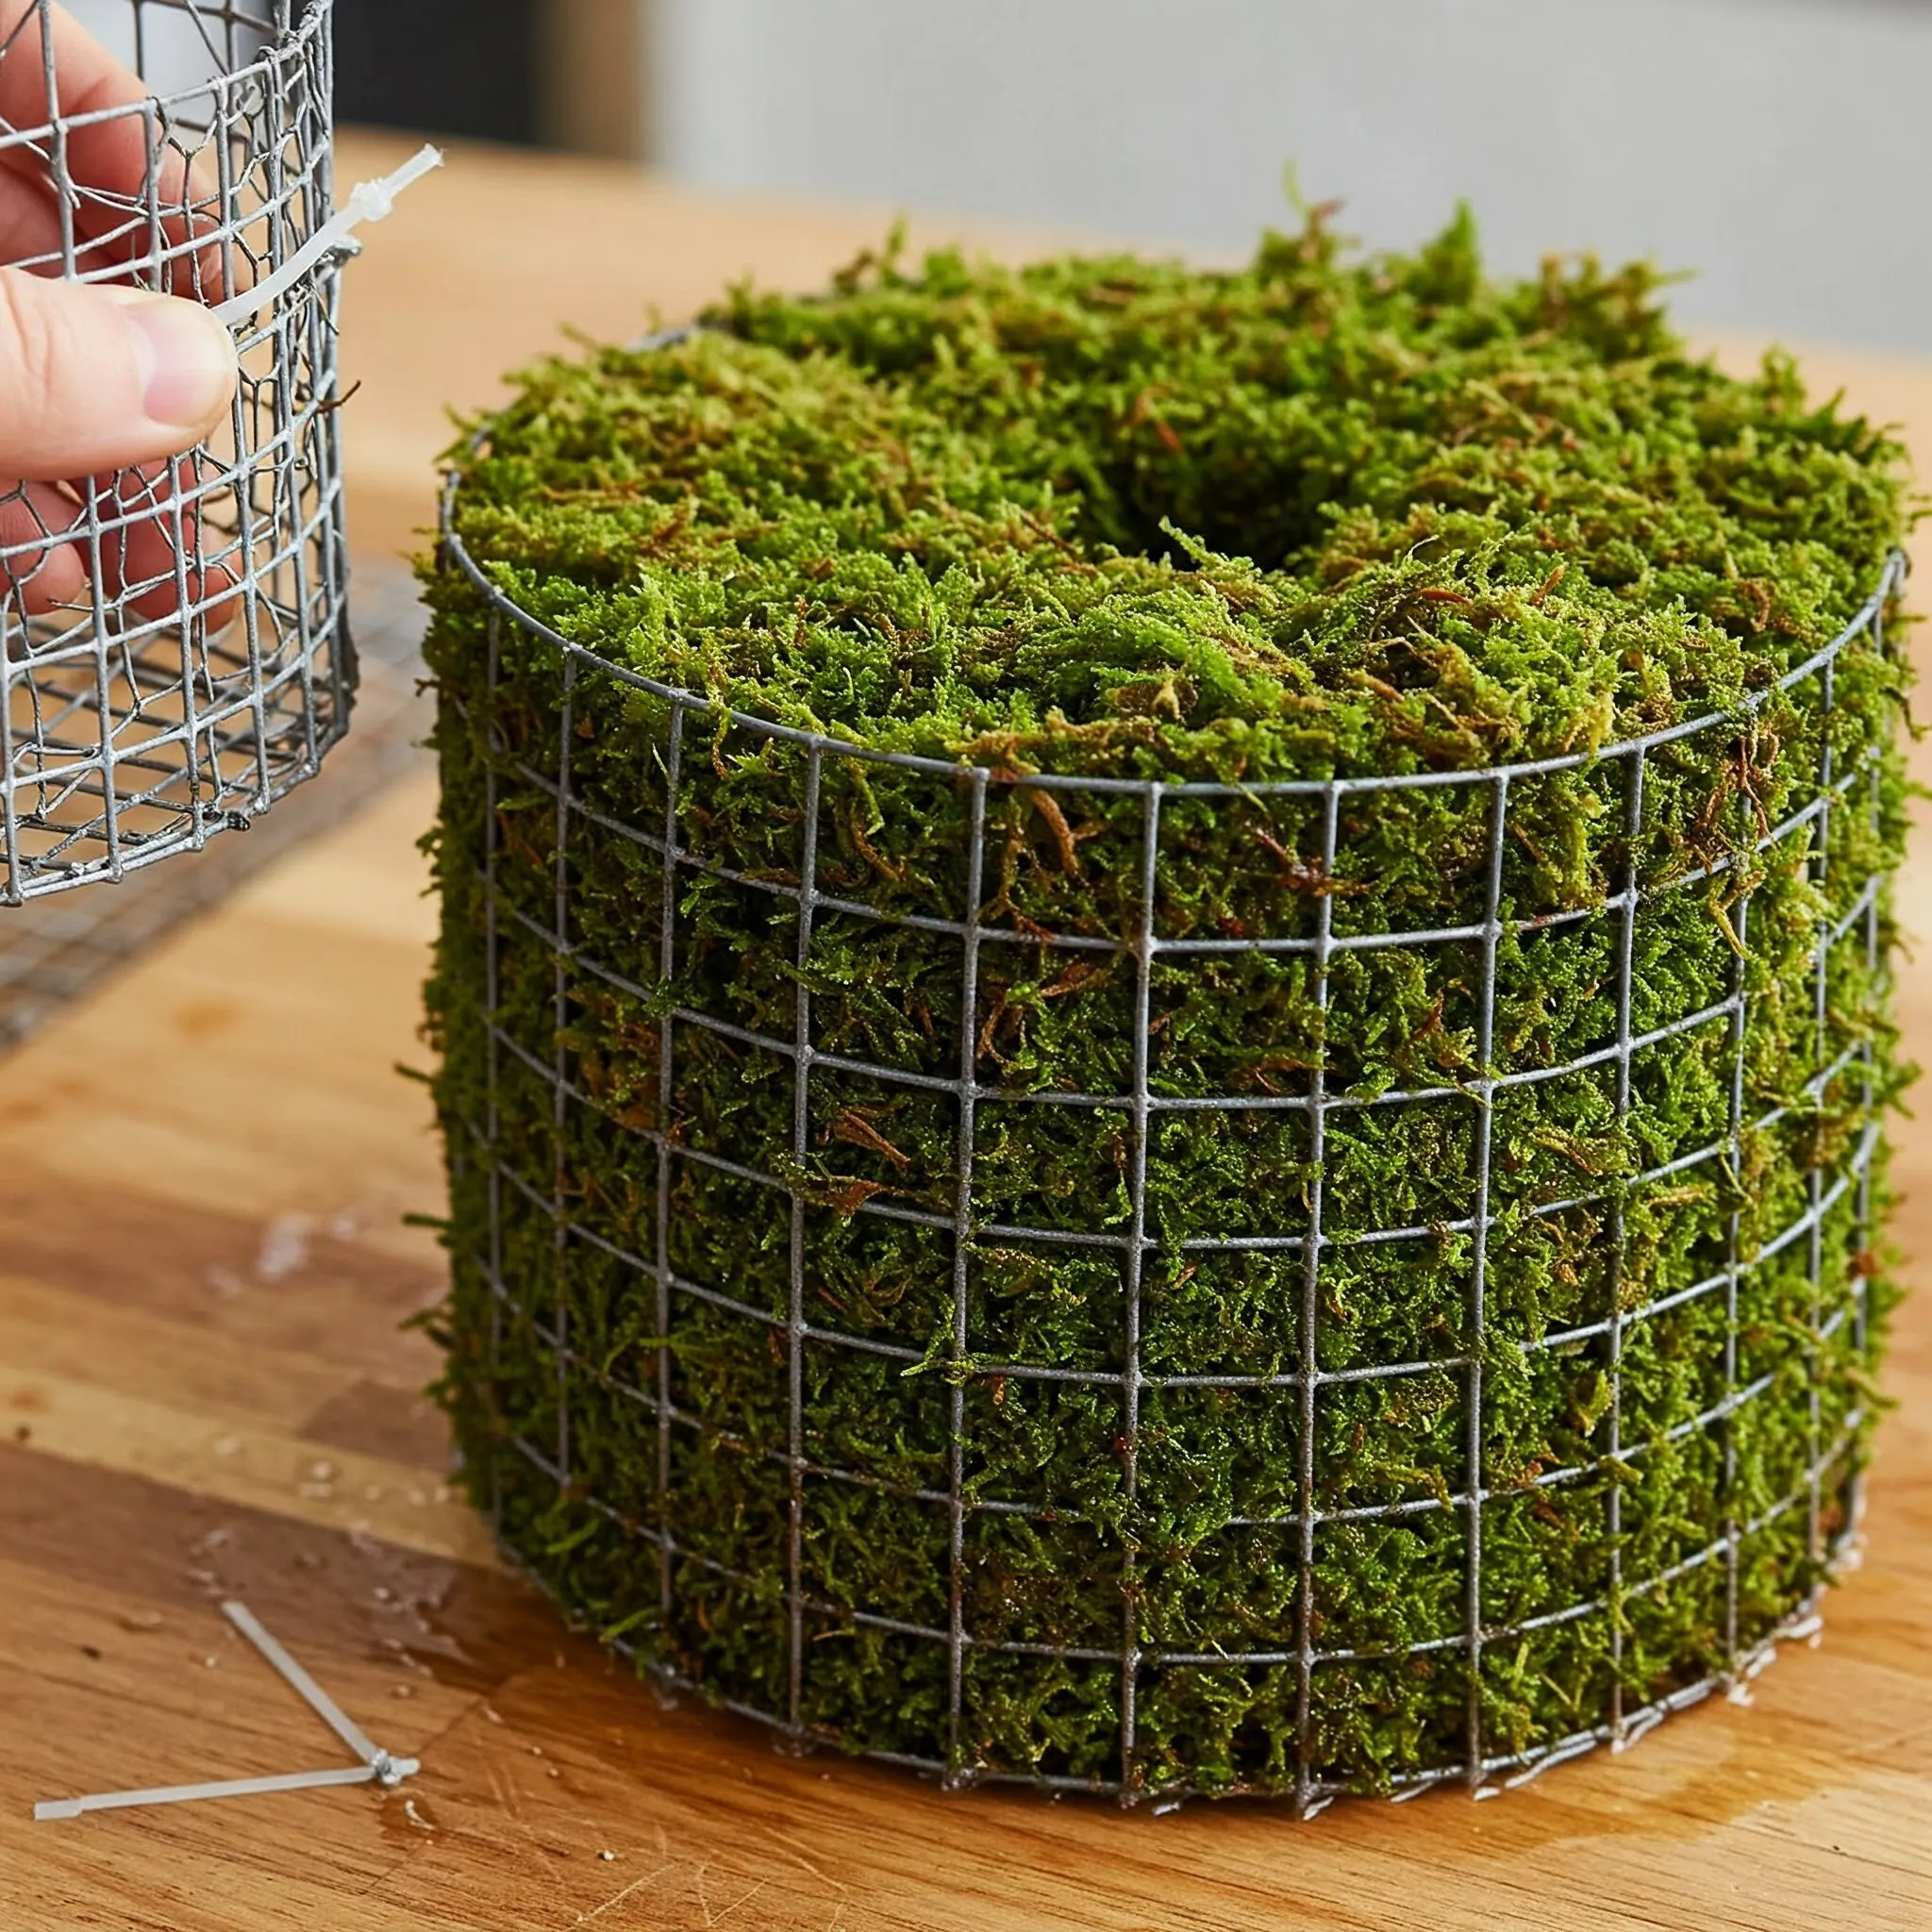
Step 4: Forming the Cylinder: Carefully shape the cut mesh into an open cylinder, allowing one edge to overlap the other by approximately ½ inch. This overlap will allow you to securely fasten the cylinder.
Step 5: Securing the Cylinder: Fasten the overlapping edges of the mesh cylinder at about 6-inch intervals using plastic-coated wire twist ties or rust-resistant copper wire. Alternatively, if you left some wire fringes when cutting your hardware cloth or chicken wire, you might be able to bend these over the opposite wire to crimp the cylinder shut without needing additional ties. This method isn't suitable for plastic mesh.
Step 6: Filling with Moss: Now, it's time to pack your damp sphagnum moss into the newly formed cylinder. You can either set the cylinder directly into your plant's pot, burying the base, or use a clever trick suggested by some plant enthusiasts: cross two small sticks (around 5 inches long) at the base of the pot to create a platform for the cylinder to sit on top of the soil. While wire cylinders are generally sturdy, a plastic one might benefit from an additional stake for support. Once your cylinder is positioned, start filling it with the dampened sphagnum moss, tamping it down firmly as you go until it's packed to the top.
====================================================================
Step-by-Step Guide: Creating a Moss-Covered Pole
If you prefer the look of a moss-covered pole, here's how to make one:
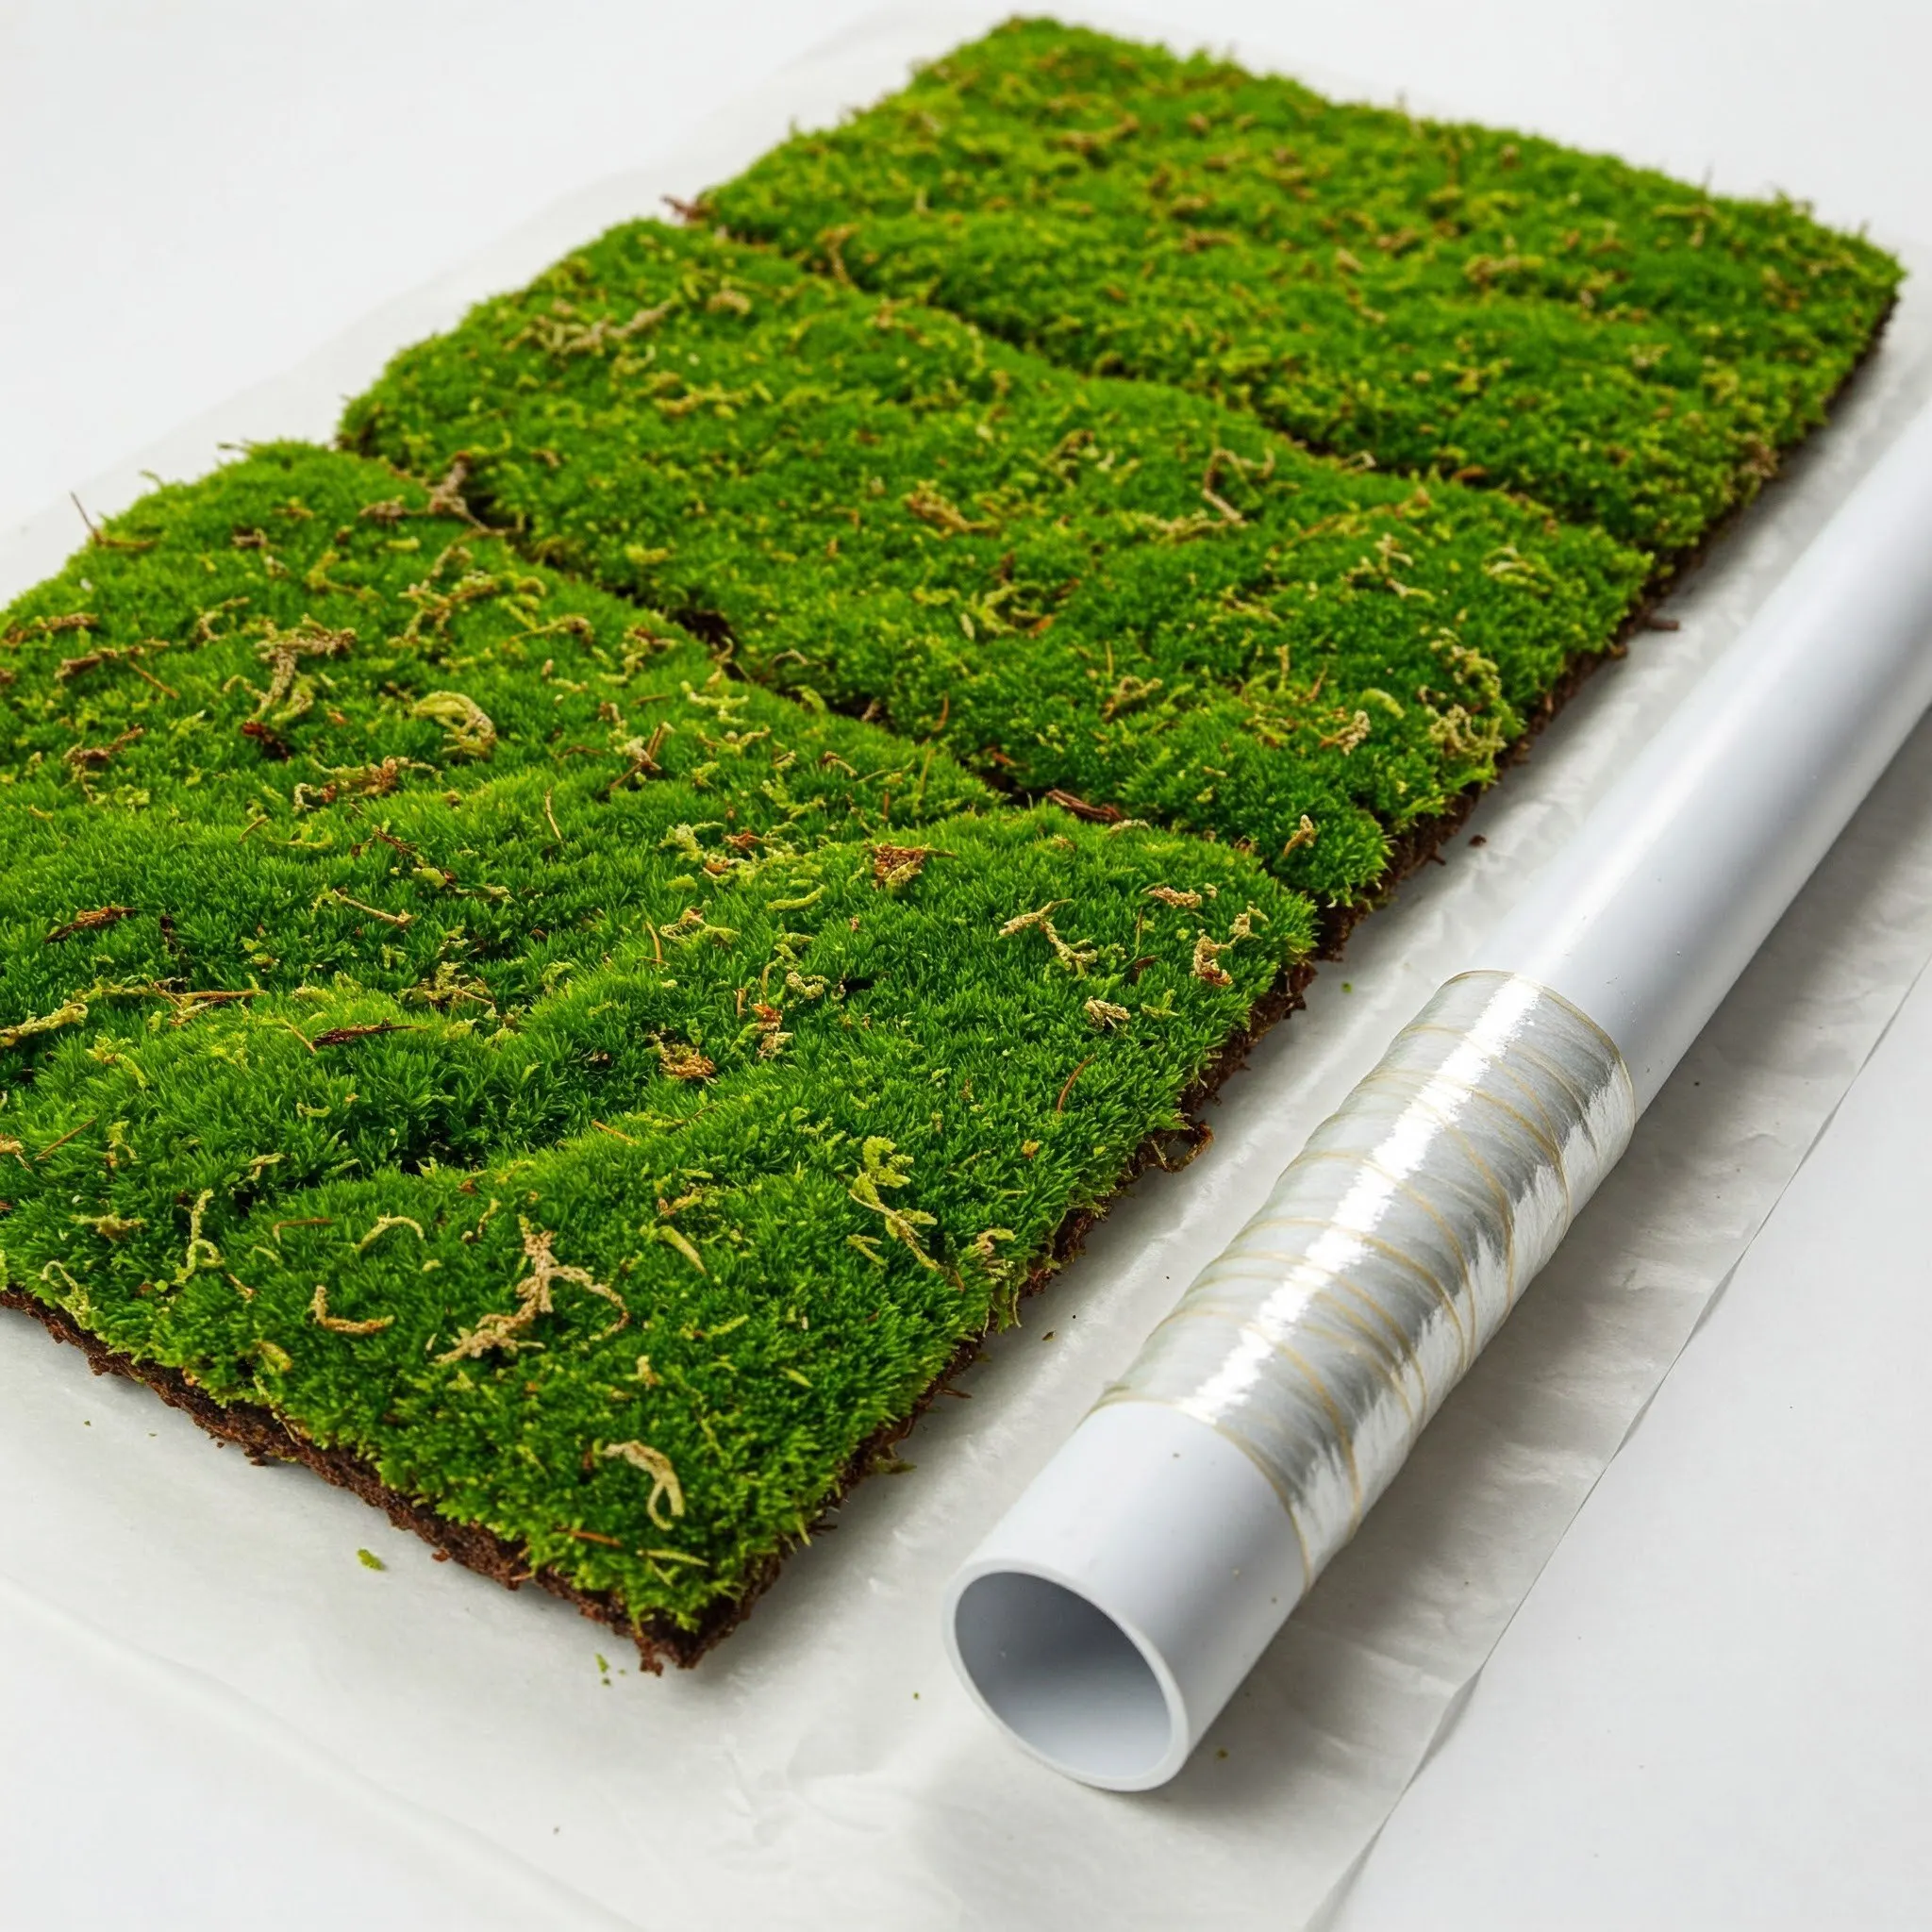
Step 1: Hydrating Your Moss (and Measuring): Just like with the filled pole, begin by soaking your chosen moss (sphagnum, sheet moss, or even a coco coir liner) in water for about 15 minutes and then squeezing out the excess moisture. While the moss soaks, measure your PVC pipe or sturdy stake to the desired height, keeping in mind the portion that will be buried in the soil.
Step 2: Preparing the Moss for Wrapping: If you're using sphagnum moss for wrapping, spread it out on a piece of wax paper that's large enough to accommodate the length of your pipe or stake. This will make the rolling process much easier.
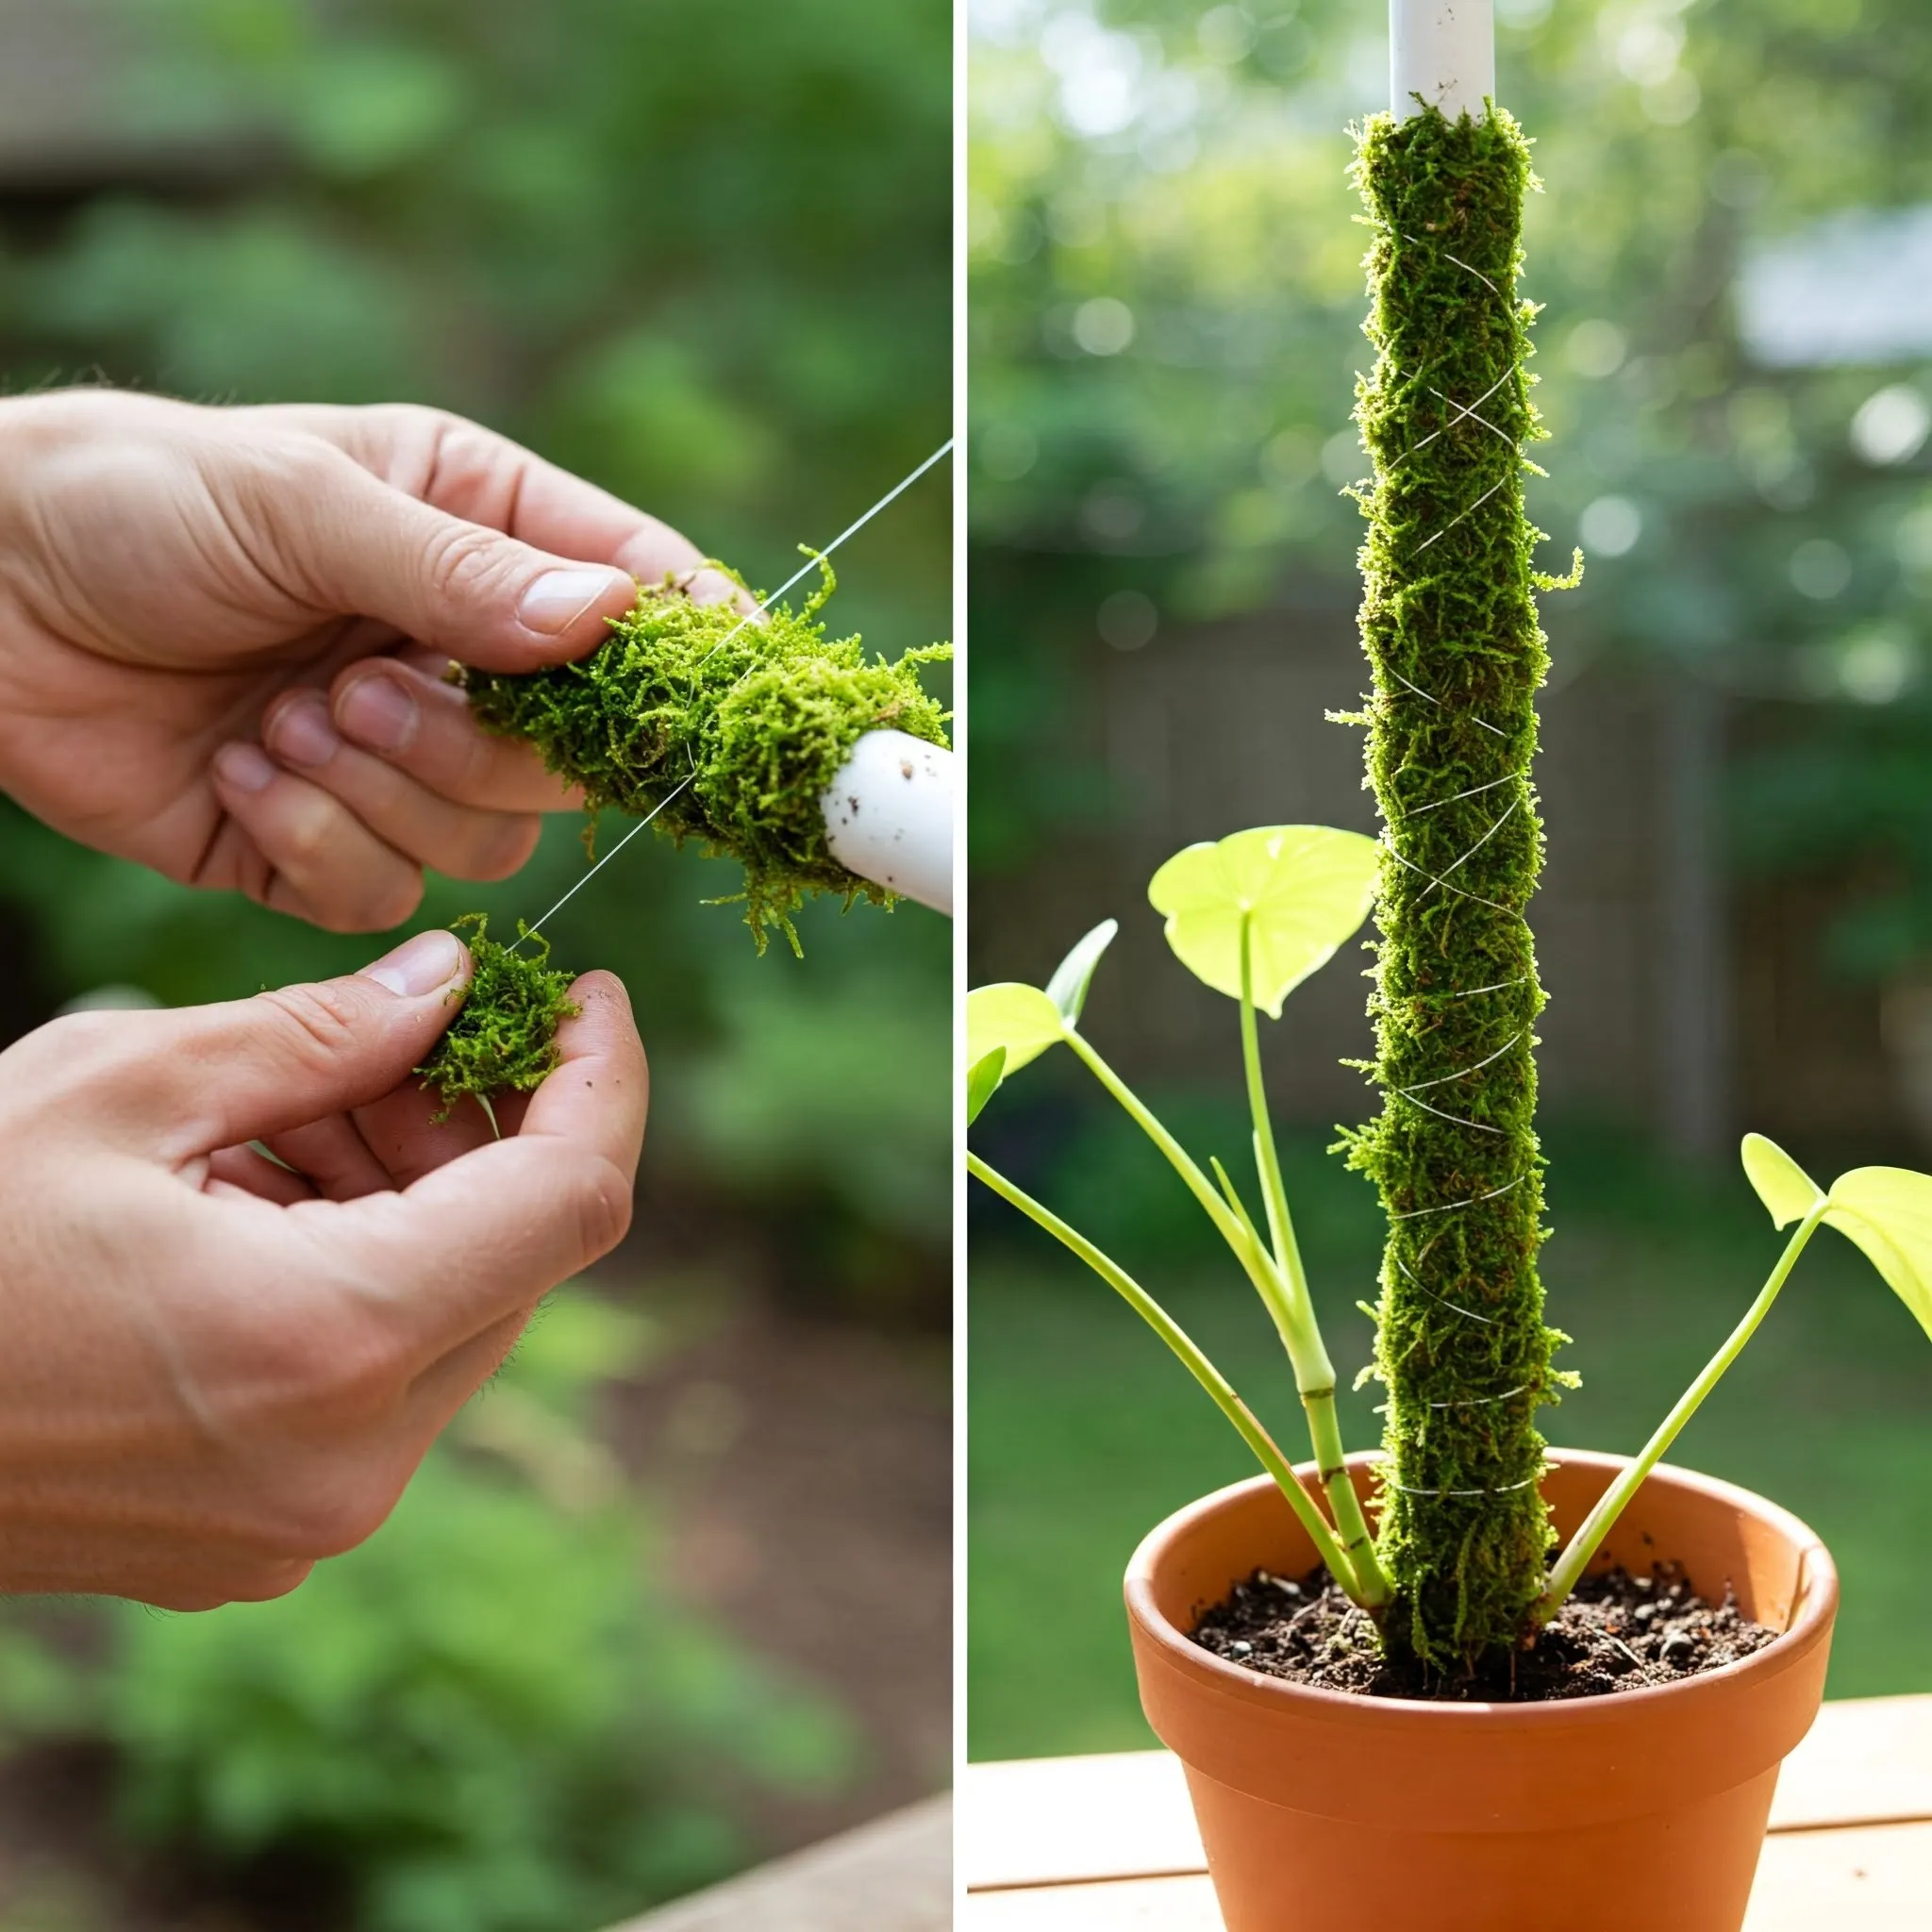
Step 3: Securing the Moss: Tie a piece of fishing line or copper wire securely to the top of your PVC pipe or stake. Then, begin rolling your prepared moss or coco coir liner around the pipe or stake, starting from the top. As you roll downwards, wrap the fishing line or wire diagonally around the moss to hold it firmly in place. Continue this wrapping motion until you reach the point where the pole will be inserted into the soil (leaving that section uncovered). Securely knot the fishing line or wire at the bottom.
Step 4: Planting Your Houseplant: Once your moss-covered pole is ready, it's time to introduce it to your plant. Carefully transplant your houseplant into its pot, positioning it close enough to the moss pole so that its shoots can easily reach and attach. Use gentle garden twine to loosely tie a few of the stems to the pole to encourage climbing.
====================================================================
Planting and Ongoing Care for Your Moss Pole
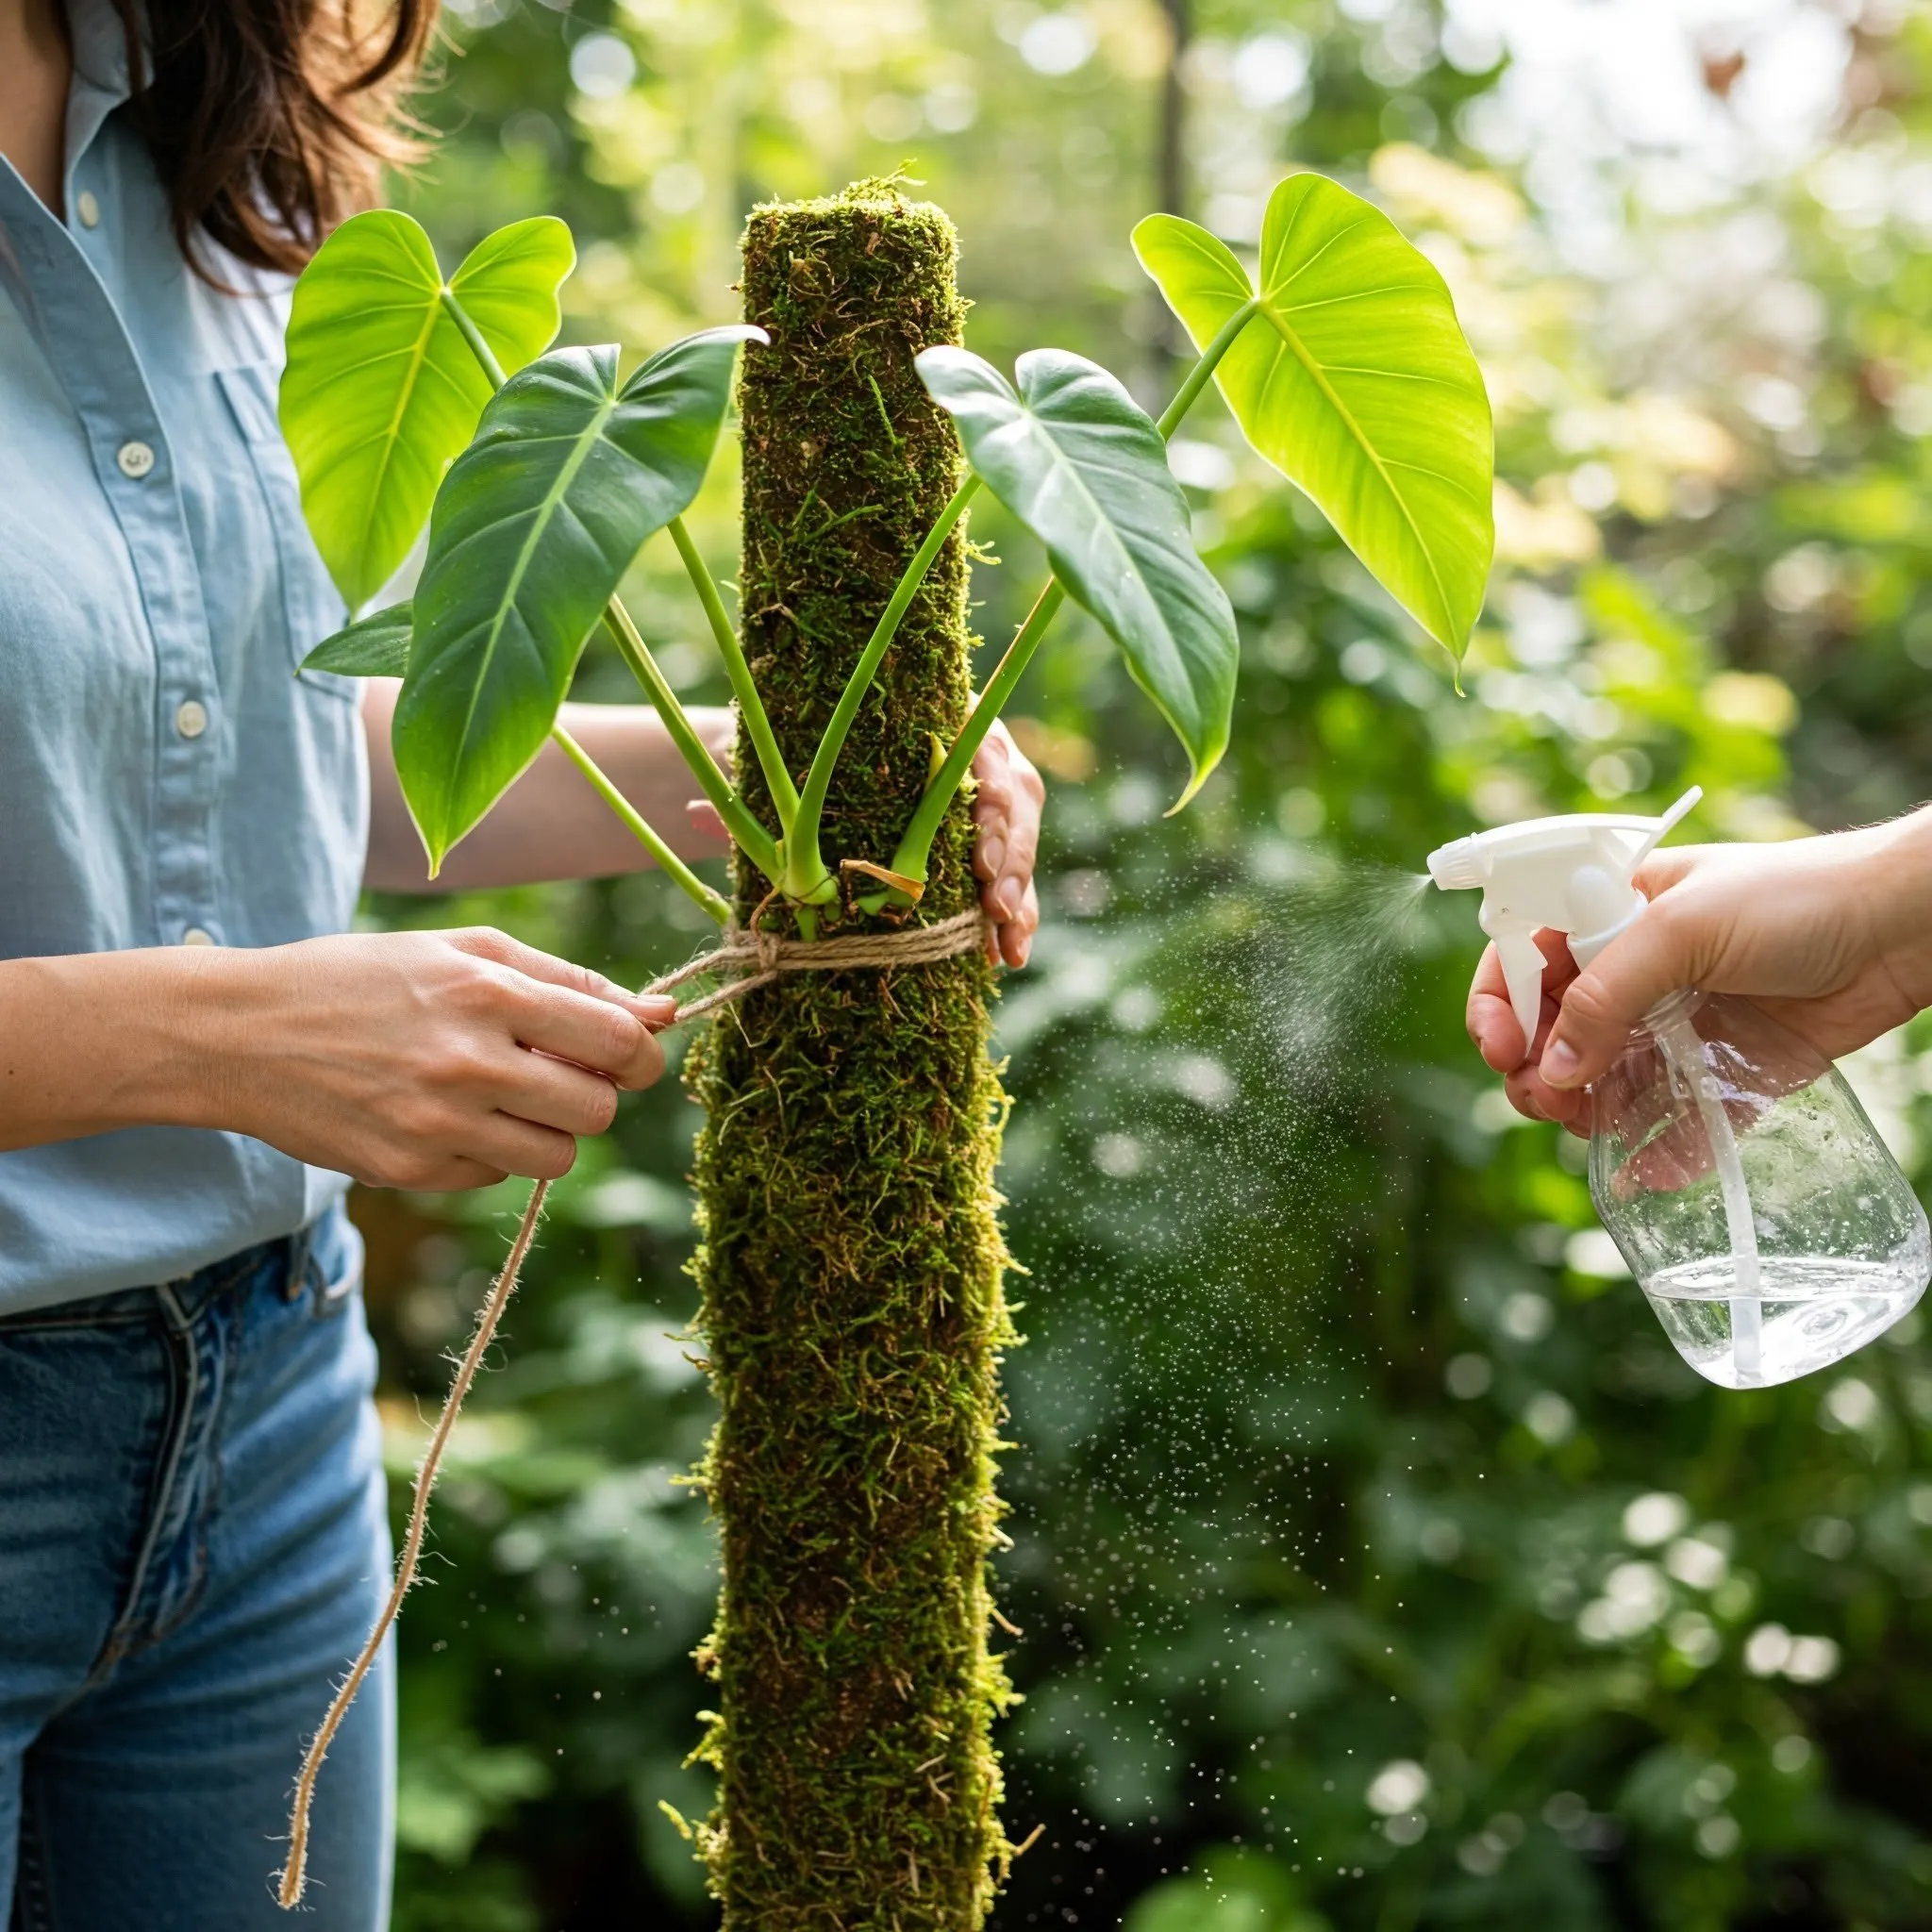
With your DIY moss pole securely in place, it's time to transplant your houseplant (if you haven't already). Position the plant close enough so its stems can easily reach the moss. Gently use garden twine to loosely attach a few of the stems to the pole.
To keep your moss pole functioning optimally, remember to keep the moss consistently damp. You can achieve this by misting it frequently with water. Another effective method is to slowly pour a small amount of water into the top of the pole when it starts to feel dry. However, be careful not to overwater, as this can lead to soggy soil and potentially cause root rot in your plant. Regularly check the moisture level of the moss and adjust your watering accordingly.
====================================================================
Final Thoughts on Your DIY Moss Pole Journey
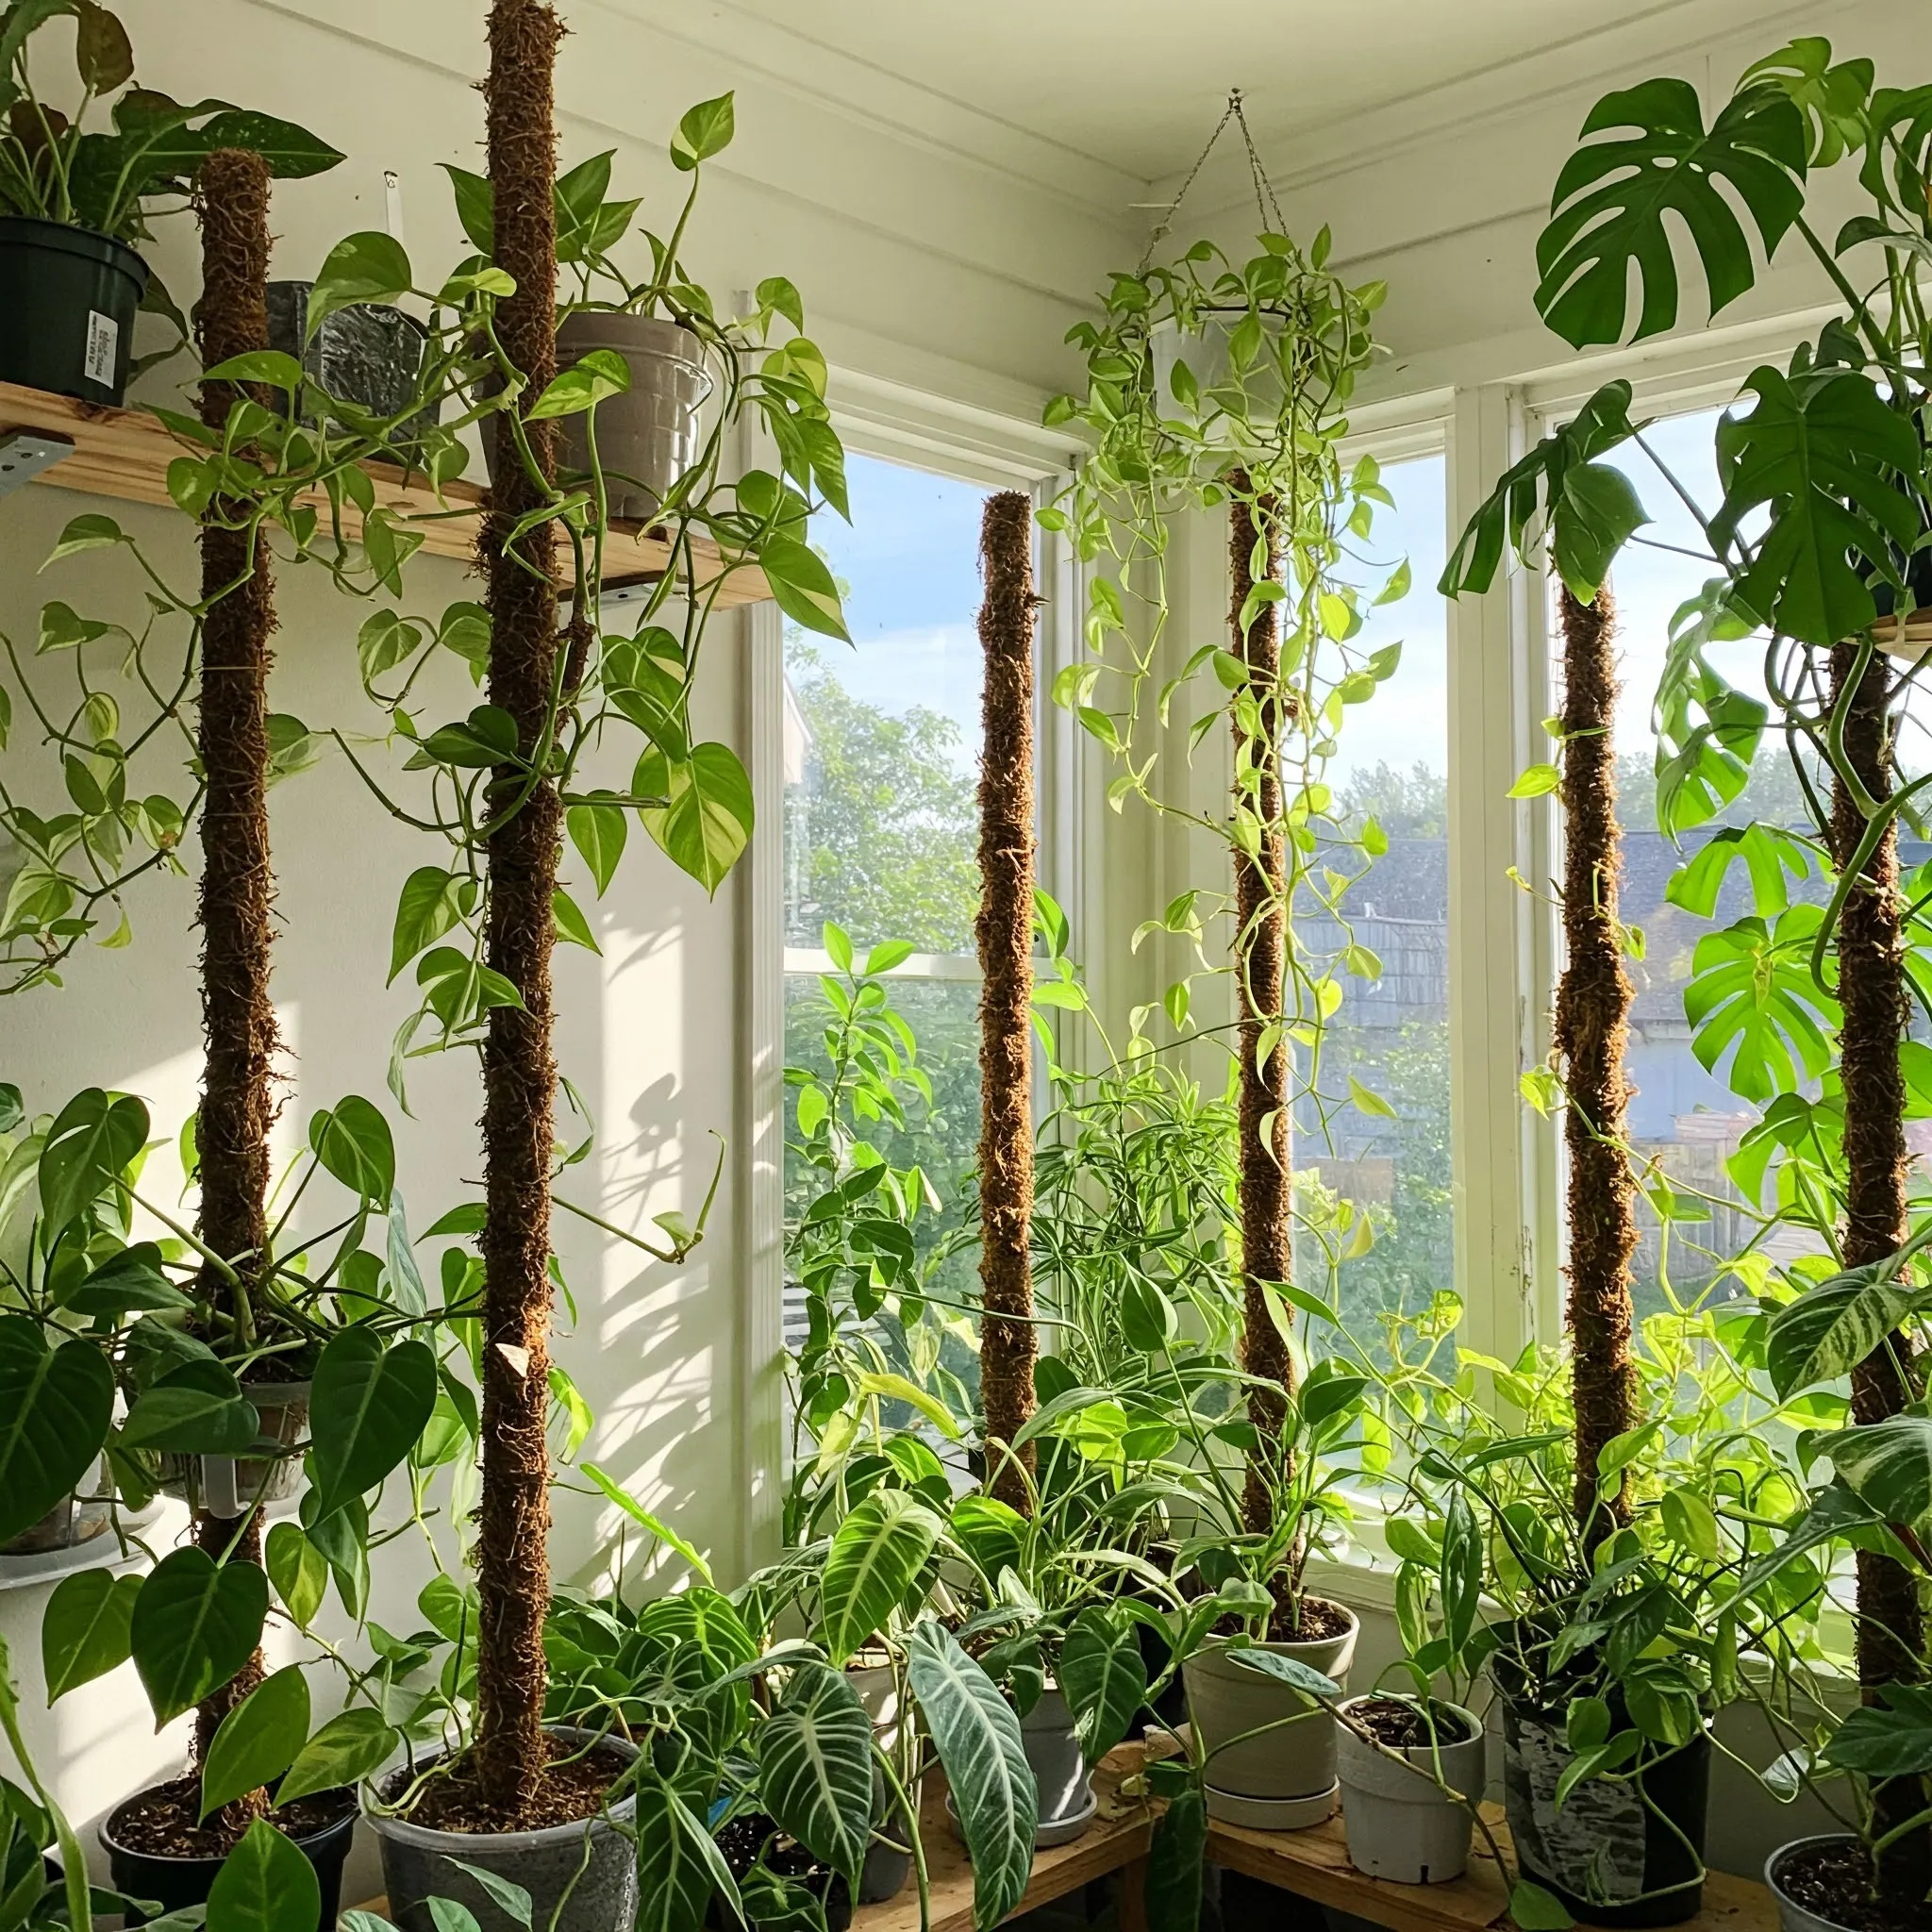
Creating your own moss pole is a rewarding project that can significantly benefit your climbing houseplants. Not only does it provide the necessary support for healthy growth, but it also adds a touch of natural elegance to your indoor jungle. While working with sphagnum moss can sometimes be a bit fiddly, remember to be patient and work with it a handful at a time rather than trying to wrap it all at once. The excellent moisture retention of sphagnum moss makes it a top choice for indoor plant poles, ensuring your plant's aerial roots have the humid environment they crave. So go ahead, give your Monstera a "monstrous" upgrade or help your Philodendron reach new heights with your very own handmade moss pole!
====================================================================
Key Takeaways for DIY Moss Poles
- Moss poles provide essential support for climbing houseplants like Monsteras and Philodendrons, mimicking their natural growth habits.
- You can choose between a moss-covered pole (moss wrapped around a core) or a moss-filled pole (moss packed into a mesh cylinder).
- Essential materials include sphagnum peat moss, hardware cloth or PVC pipe, wire cutters, and twist ties or fishing line.
- Soaking the moss before use is crucial for both types of poles.
- Ensure the pole is tall enough to accommodate your plant's current size and future growth.
- Bury the bottom portion of the pole in the soil for stability.
- Keep the moss consistently damp by misting or gently watering the top of the pole.
- DIYing a moss pole is a cost-effective and customizable way to support your beloved houseplants.
Popular Posts